Home Lab Setup for Cybersecurity Testing
- Souleymane Diallo
- Jan 14
- 4 min read

Updated: Jan 20
Acknowledgment: The success of this project was significantly enhanced by the guidance and resources available on the MyDFIR YouTube channel. Their detailed tutorials and expert insights played a crucial role in shaping the development of this lab.
Objective
The goal of this lab is to create a secure virtual environment for cybersecurity testing. This home lab will allow you to safely experiment with new tools, techniques, and even malware without risking your primary system. The lab will use VirtualBox to create and manage virtual machines (VMs) running different operating systems like Windows 10 and Kali Linux, providing a safe sandbox for cybersecurity practice.
Skills Learned
Setting up and configuring virtual machines in a sandboxed environment.
Verifying software integrity using checksum (SHA-256).
Installing and configuring Windows and Linux operating systems in virtual environments.
Snapshot management for VM backups and restoration.
Safe execution of malware for analysis in a controlled environment.
Resource allocation and system performance management for VMs.
Tools Used
VirtualBox: Virtualization platform to create and manage virtual machines.
Windows 10 ISO: Operating system image used for Windows VM.
Kali Linux VM: Pre-built virtual machine for cybersecurity testing and attacks.
Media Creation Tool: Tool to create a Windows ISO image.
7-Zip: File archiver for extracting downloaded Kali Linux files.
PowerShell: Windows terminal used for verifying file integrity with checksum.
Microsoft Visual C++ 2019: Required dependency for VirtualBox installation.
Step-by-Step Guide
Step 1: Choosing a Virtualization Platform
There are various virtualization platforms to choose from:
VirtualBox
VMware
Hyper-V
Windows Sandbox
For this lab, we’ll use VirtualBox because it is free, open-source, and widely used in cybersecurity labs.
Step 2: Installing VirtualBox
Go to the VirtualBox Website:
Navigate to VirtualBox.org and download the latest version (e.g., VirtualBox 7.1).

Select Your OS:
Choose the appropriate version for your system. In this case, we’ll download VirtualBox 7.1.2 for Windows. Next, we will click on “File Checksums to verify the downloaded file integrity.

Verify Download Using SHA-256:
After downloading, verify the file’s integrity using the SHA-256 checksum.
Open PowerShell and run:
Get-FileHash <file_name> -Algorithm SHA256
Compare the checksum to the one listed on the VirtualBox download page. We can see they are the same.

Install VirtualBox:
Run the installer by double-clicking the downloaded file.

Resolve Dependencies:
If you encounter missing software dependencies (like Microsoft Visual C++ 2019), follow the instructions and install them. I have provided the link below.

Latest supported Visual C++ Redistributable downloads
Configure installation settings:
Choose where to install VirtualBox (default or custom location) and allow any network resets that might be necessary during installation.

Be aware: The installation may briefly disconnect your network.

Once VirtualBox installation is done, Click on finish and VirtualBox will appear automatically.

Step 3: Downloading and Verifying a Windows 10 ISO
Navigate to the Microsoft Website:
Visit the official Windows 10 download page.
Download the Media Creation Tool:
Download the tool, which helps you create a Windows 10 ISO image.
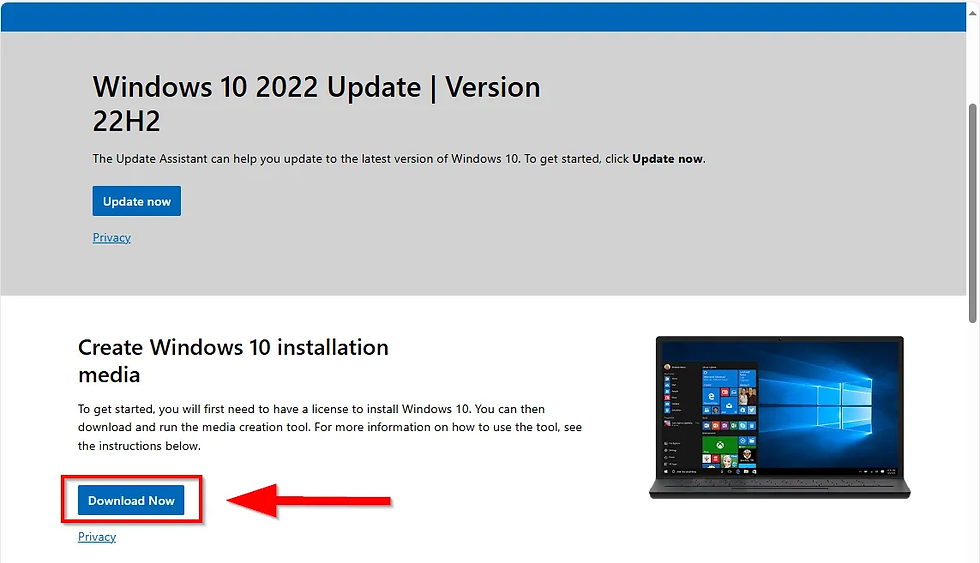
Create a Windows 10 ISO:
Run the tool, accept the license agreement, and choose "Create Installation Media".


Choose the language, edition, and architecture.

Save the ISO file to your preferred directory.

Verify the ISO File:
Check the hash of the ISO file to ensure its integrity using the same Get-FileHash command as above.
Step 4: Creating and Configuring a Windows 10 Virtual Machine (VM)
Open VirtualBox:
In VirtualBox, click New to create a new VM.

Configure VM Settings:
Name the VM (e.g., "Windows10 Test").
Choose the location for storing VM files.
Select the ISO image you downloaded earlier.

Allocate Resources:
Assign 4 GB RAM and 1 CPU to the VM, depending on your system’s capacity.
Set a virtual hard disk size of 50 GB.

Install Windows 10:
Start the VM, follow the Windows installation process, and choose "I don't have a product key" when asked.
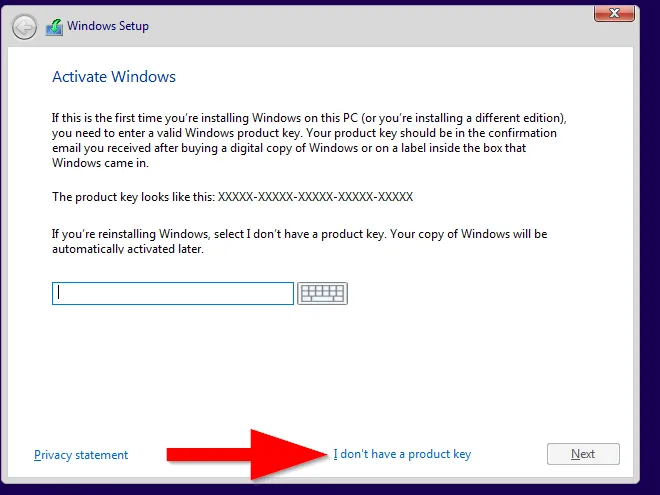
Choose Windows 10 Pro and perform a custom install.


Step 5: Setting Up Kali Linux as the Attacker Machine
Download Kali Linux VM:
There are multiple ways to obtain Kali Linux for your virtual environment. You can either download the Kali Linux ISO file and install it manually, or you can use a pre-built virtual machine image specifically designed for VirtualBox. For this lab, we'll use the pre-built option.
Go to kali.org and download the pre-built virtual machine for VirtualBox. Make sure to choose the appropriate version for your system.


Extract Kali Linux Files:
Navigate to 7-zip.org to download and install 7-zip and use 7-zip to extract the downloaded file.

Import Kali VM into VirtualBox:
Double-click the .vbox file to automatically import it into VirtualBox.

The default credentials for Kali Linux are:
Username: kali
Password: kali

Step 6: Security Considerations
Sandboxed Environment:
Simply creating a VM does not automatically isolate it. Improperly configured VMs can infect your host machine and other network devices.
Do not run untrusted malware until you have verified proper sandboxing.
Create Snapshots:
Before experimenting, take snapshots of your VM.
Go to the Snapshots tab in VirtualBox, click Take Snapshot, and provide a name (e.g., "Baseline").

Or right click on your virtual machine and click on snapshot.

Give your snapshot a name. I named mine “Baseline”.

If something goes wrong, you can revert to the saved snapshot.
System Specifications:
Be cautious about over-allocating resources. Ensure your PC can handle the VMs without crashing.
Conclusion
Congratulations! You now have a fully functional home lab for cybersecurity testing. Use this environment to safely learn, experiment, and improve your skills in both offensive and defensive cybersecurity practices. Remember to take frequent snapshots and ensure your virtual machines are properly sandboxed to prevent any unwanted infections.
Testing Your Lab Environment Scenario you can explore
Run Basic Scenarios:
Use Kali Linux to launch basic attacks against your Windows 10 VM (e.g., scanning, malware simulation).
Tools like Nmap and Metasploit can help you test defenses.
Telemetry & Logging:
Use logging tools like Sysmon and Splunk in Windows 10 to gather telemetry data during attacks.
Analyze the data to understand malicious activity and identify potential indicators of compromise (IOCs).


Comentários